A while ago I started building a C# Wrapper (WordPressPCL) for the new WordPress REST API that was released in version 4.7. At first it was a regular Portable Class Library (hence the name), but with the release of .NET Standard I quickly switched to this new format which is more compatible and easier to understand. If you’re new to .NET Standard, check out these great introduction videos by Immo Landwerth.
Since I’m getting more and more pull requests for this project I decided to automate the build & publishing process using Microsofts pretty great Visual Studio Team Services. If you haven’t checked them out, I highly recommend taking a closer look. Everything I’m doing here is completely free since my team is smaller than 5 people (1 < 5).
So the basic idea is:
- Get the code from GitHub
- Build the .dll using Visual Studio
- Create a NuGet package
- publish it to the public nuget.org feed
I wont set up continuous integration since I want full control and not have packages published by accident. So I’ll still have to trigger the process manually, which is fine in this case. That also means I don’t care about automatic versioning for now and will just update the package version manually as well before checking in my code. Check out this great blog post by Ben Chartrand if you’re interested in automatically incrementing the version number.
Step 0: Set up project to build NuGet package
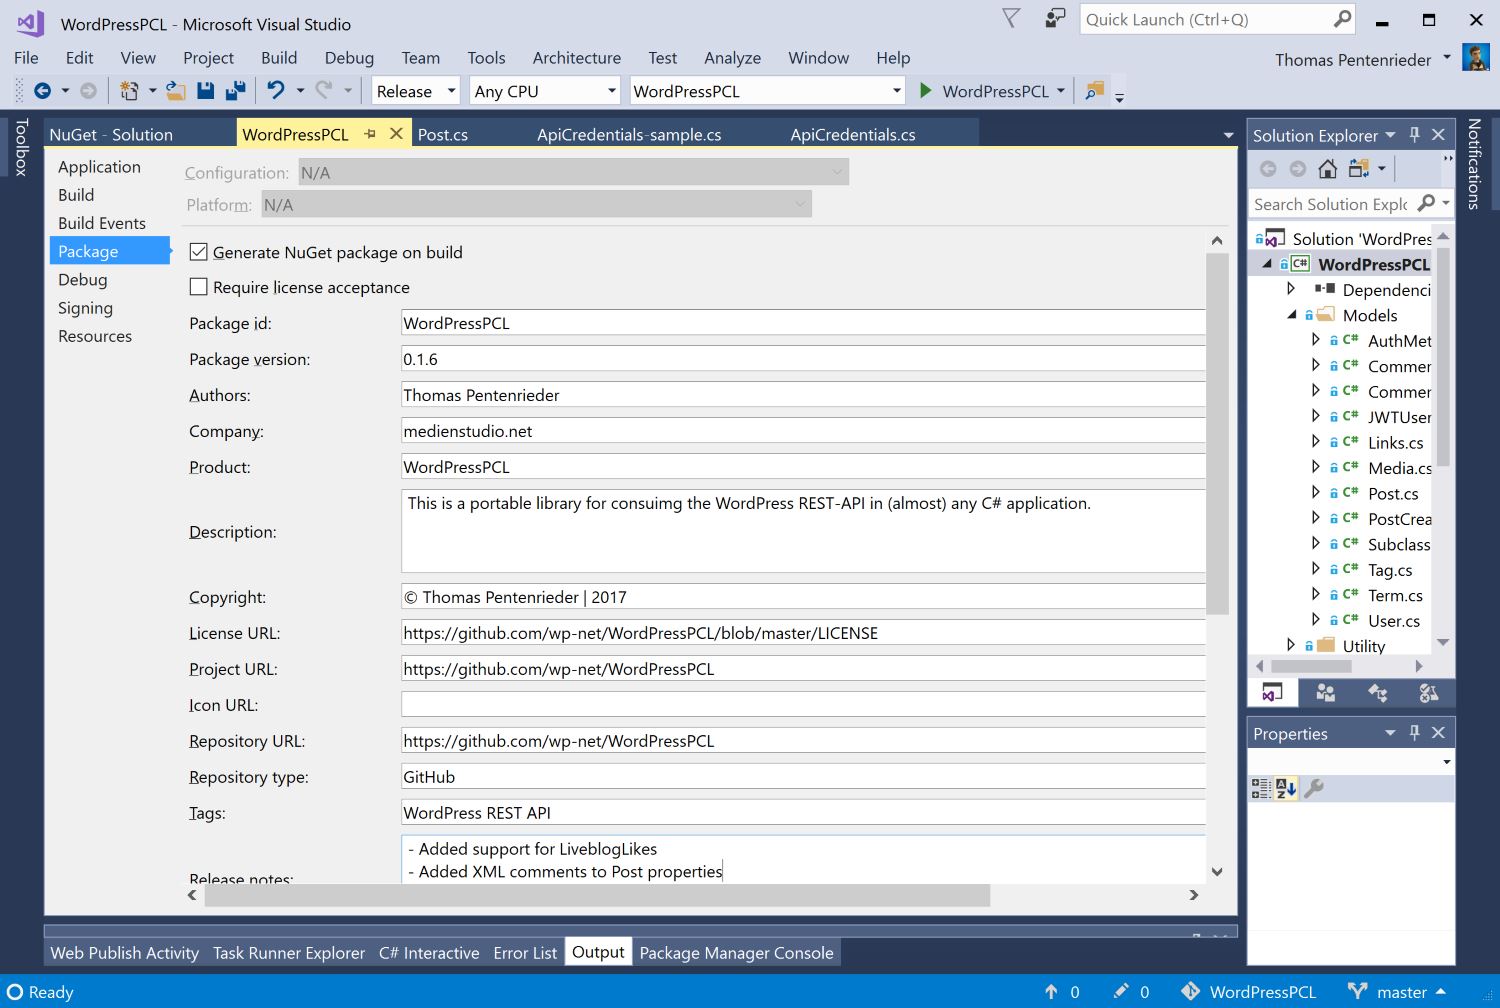
Before we start creating the build chain, go into Visual Studio 2017 (any edition will do) and open up your project properties. Go to the Package tab and make sure to select the Generate NuGet package on build option. Fill out the rest of the fields as well. This information will be used to create the NuGet Specs for your package. Check in your code.
Step 1: Create Build Definition
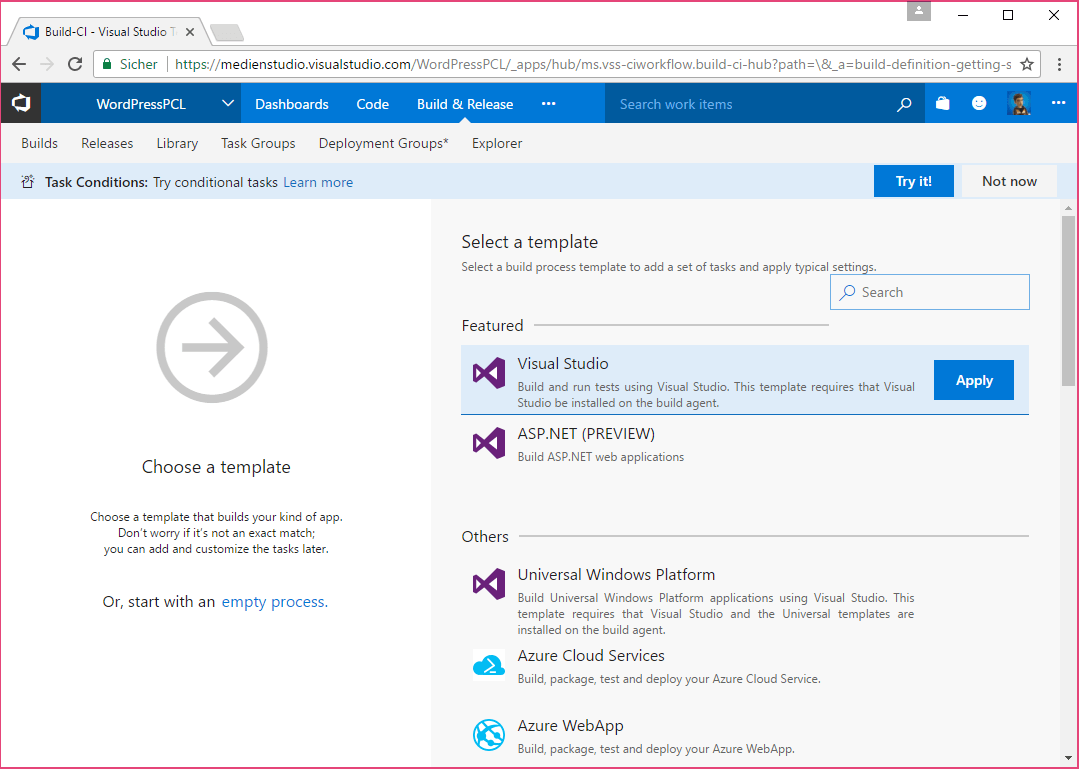
We create a new build definition using the standard Visual Studio template. We can remove a lot of the build steps immediately (see second image), but this will give us a nice starting point.
Step 2: Get the code
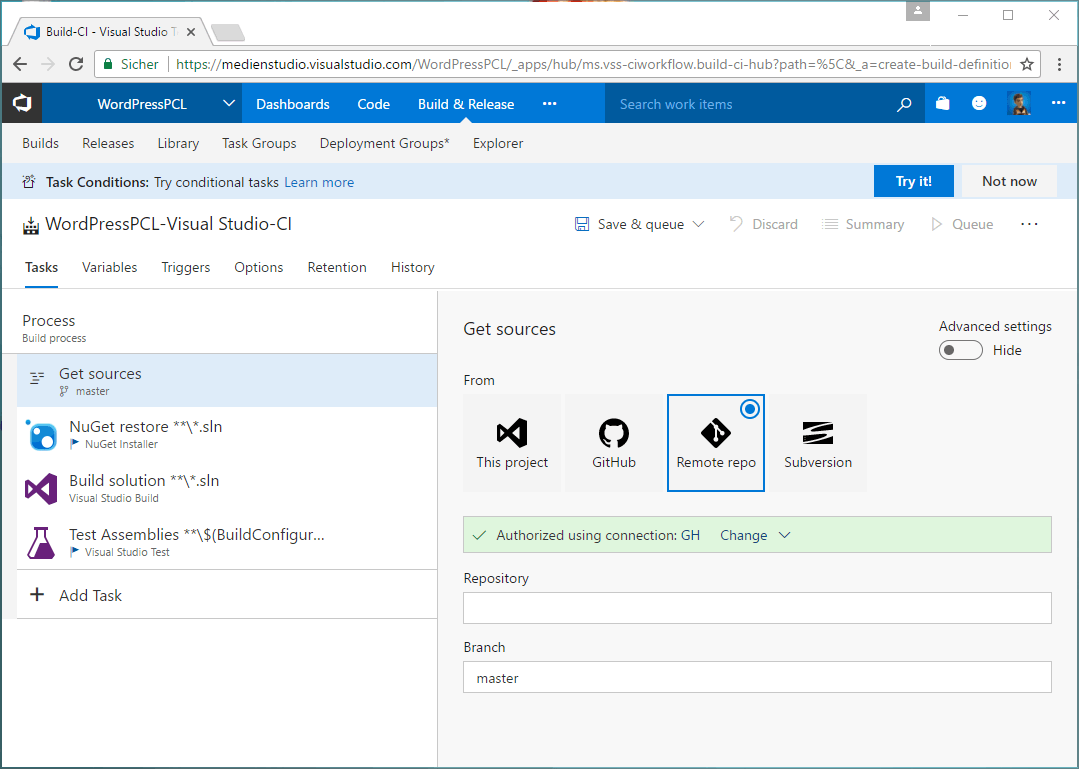
You can get your source code from VSTS, GitHub or any Git repository you like. Unfortunately the GitHub connector does not yet support repos from an organization so I had to manually set up the access to my GitHub repository.
Step 3: Setup NuGet restore
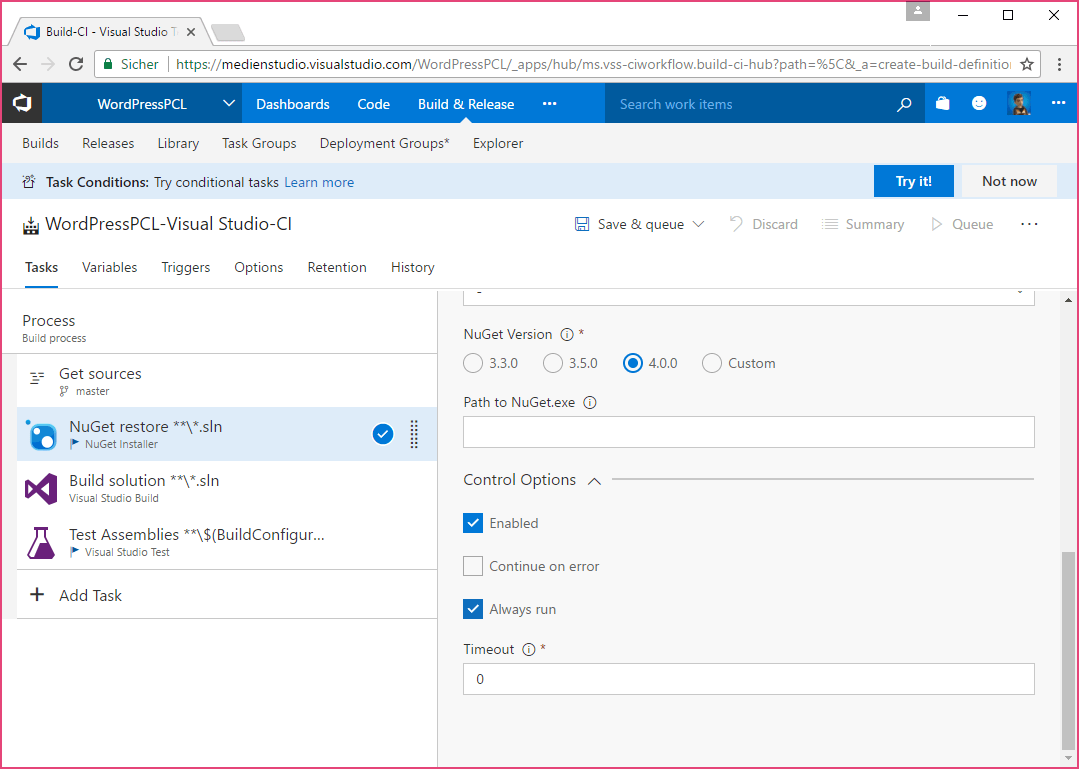
Next we need to make sure that we’re using NuGet Version 4.0.0 so the packages can be restored without any issues.
Step 4: Configure Build solution step
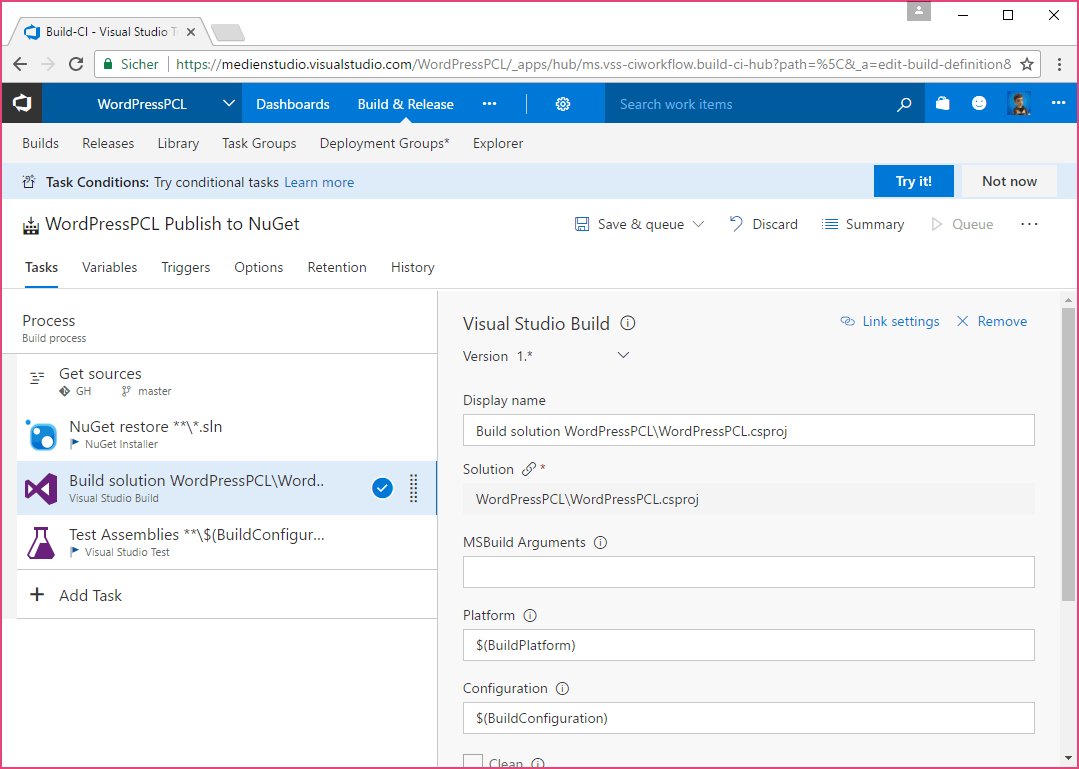
To have my package build without issues, I had to switch change the Solution-field from the wildcard **\*.sln to my actual .csproj-path, so WordPressPCL\WordPressPCL.csproj. To change the value, you’ll need to unlink the solution first.
Step 5: NuGet Publisher
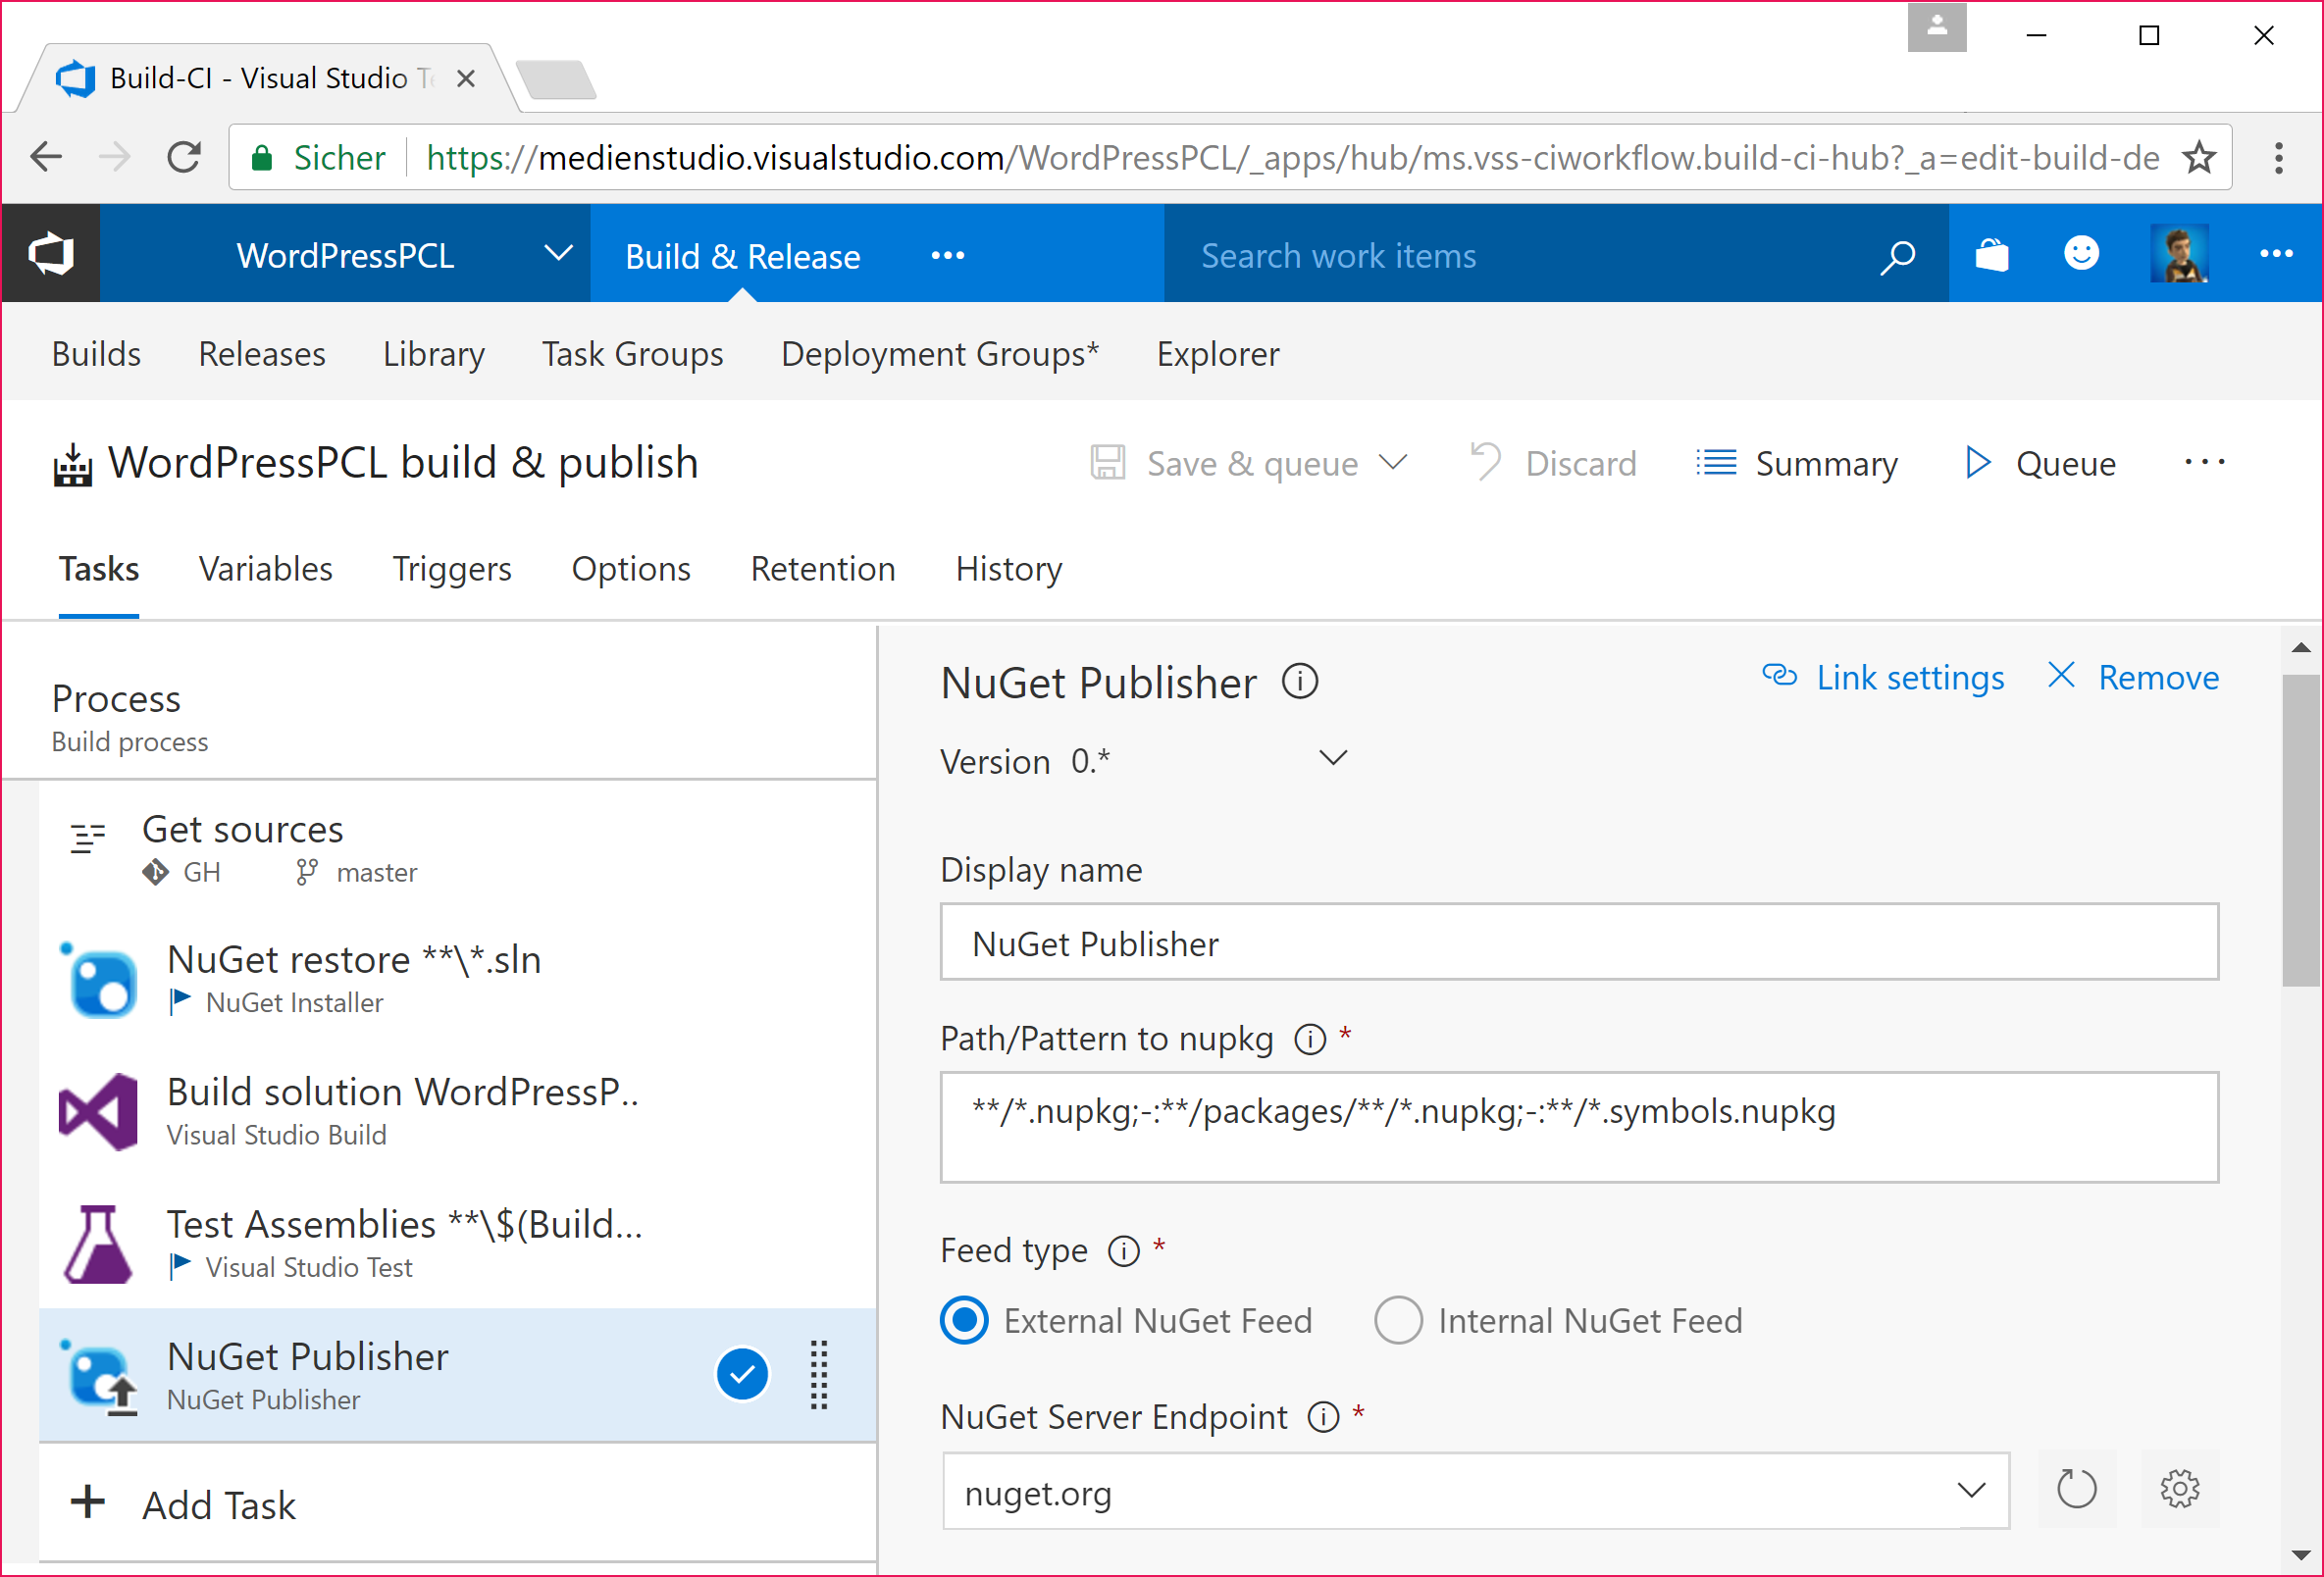
Now for the interesting part. Add the NuGet Publisher task to your queue. We don’t need the NuGet Packager since Visual Studio already built that package for us.
Here we have to set the NuGet Server Endpoint, which we’ll need to add to our list of Endpoints first by hitting the small cog next to the input field.
Click on New Service Endpoint -> Generic, give it a name, https://nuget.org/ as the Server URL and enter your nuget.org Username.
Then, go to nuget.org/account and create a new API key to use as the Password/Token Key.
After saving those settings you can go back to your NuGet Publisher step and select the newly created Endpoint from the dropdown menu. Under Advanced, select NuGet Version 4.0.0.
And that’s it. Your .NET Standard library should now be built as a NuGet Package and published to the public nuget.org feed.